
| cwave.eu5.org
Also see: http://www.angelfire.com/dragon/letstry cwave04 at yahoo dot com |
 Last updated on Wed Dec 22 10:24:57 IST 2010. |
|

State machines
State machines are useful in various fields besides robotics. Here, however, we shall concern ourselves with only its application in robotics. For a more general tutorial on finite state machines please see here.An example: counting
We have learned how to make a robot eye earlier. We shall now program our robot to count flashes of light. The first step is to identify all the inputs and to list all the possible combination of values these can take. Here we have just one input line, and this can take the values 0 and 1. In DFA parlance it is customery to call each of these values a separate input. Thus, our DFA has two inputs, though from the viewpoint of the hardware connection there is just a single input line. Our first step is to identify the pin to which this line is connected.#define INPMASK (1<<0) #define LIGHTOFF ((PIND & INPMASK)==0) #define LIGHTON ((PIND & INPMASK)==MASK)Next comes the trickiest step: we have to identify all the states we can be in. The term state here means situations that interest us. In our example there are just two: light and dark. (If we were interested in the colour of the light then the states could be something like dark, red and blue.) Next we make a diagram where all the states are shown as small circles.
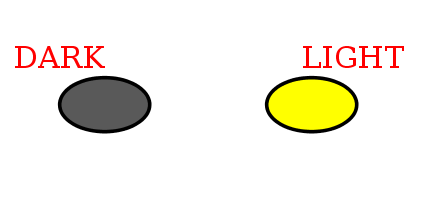 |
| Step 2: Showing the states |
#define's.
#define DARK 0
#define LIGHT 1

unsigned char state;
Next we determine the state transitions: which input causes us to change the state. In most simple examples this can be done by inspection. However, a more formal approach (which is very useful for complex problems) is to carefully think about all the (state, input) pairs.
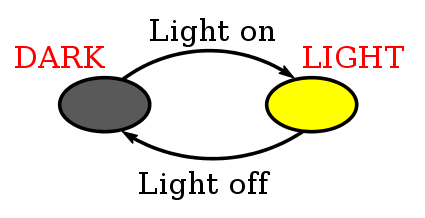 |
| Step 3: Showing the state transitions |
#define DARK 0
#define LIGHT 1

unsigned char state;

state = LIGHT;
count = 0;
switch(state) {
  case LIGHT:
    if(LIGHTOFF) {
      state = DARK;
    }
    break;

  case DARK:
    if(LIGHTON) {
      state = LIGHT;
    }
    break;
}
Now, we want to add the output. In our example the output is to
increment a counter and display in contents via some port.
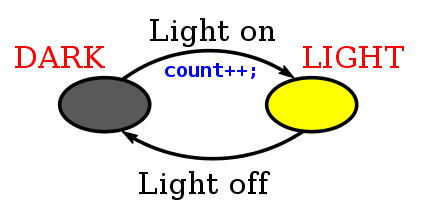 |
| Step 4: Showing the outputs |
#define DARK 0
#define LIGHT 1

unsigned char state, count;

state = LIGHT;
switch(state) {
  case LIGHT:
    if(LIGHTOFF) {
      state = DARK;
    }
    break;

  case DARK:
    if(LIGHTON) {
      count++;
      state = LIGHT;
    }
    break;
}
There is just one more step remaining: deciding about the initial
state. It depends on the particular use of the robot eye, if we
are interested in counting flashes, then initially we are in the
dark state. If we are couting shadows then we are initially in
the light state.
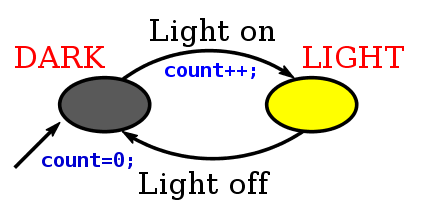 |
| Step 5: Showing the initial state |
#define DARK 0
#define LIGHT 1

unsigned char state, count;
state = LIGHT;
count = 0;
switch(state) {
  case LIGHT:
    if(LIGHTOFF) {
      count++;
      state = DARK;
    }
    break;

  case DARK:
    if(LIGHTON) {
      state = LIGHT;
    }
    break;
}
The complete C code is:
#include <avr/io.h>

#define DARK 0
#define LIGHT 1

main() {
  unsigned char state, count;
  state = LIGHT;
  count = 0;
  while(1) {
    switch(state) {
      case LIGHT:
        if(LIGHTOFF) {
          count++;
          state = DARK;
        }
        break;

      case DARK:
        if(LIGHTON) {
          state = LIGHT;
        }
        break;
    }
  }
}
